The Cake Merchant

  • Home
  • About
  • recipes
  • Contact

Dark Chocolate Matcha Layer Cake

10.01.14

Dark Chocolate Matcha Cake

I’ve been having some anxiety about writing this post because I don’t know whether to call it matcha or matcha tea or matcha green tea. Are any of these redundant, or all they all correct? For now I’ll call it matcha, but please correct me if I’m wrong. I totally roll my eyes when people say chai tea, so if I’m going to be all judgy, I better use matcha correctly.

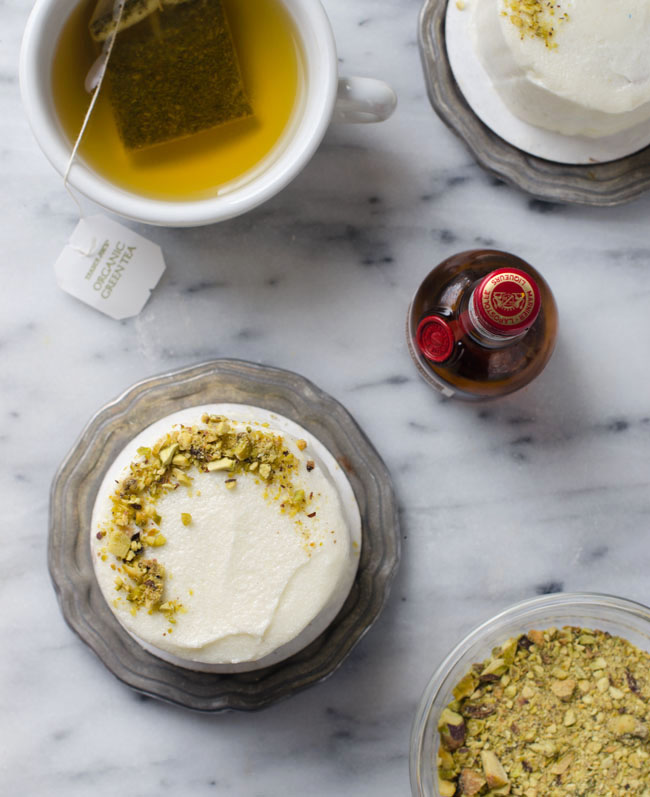
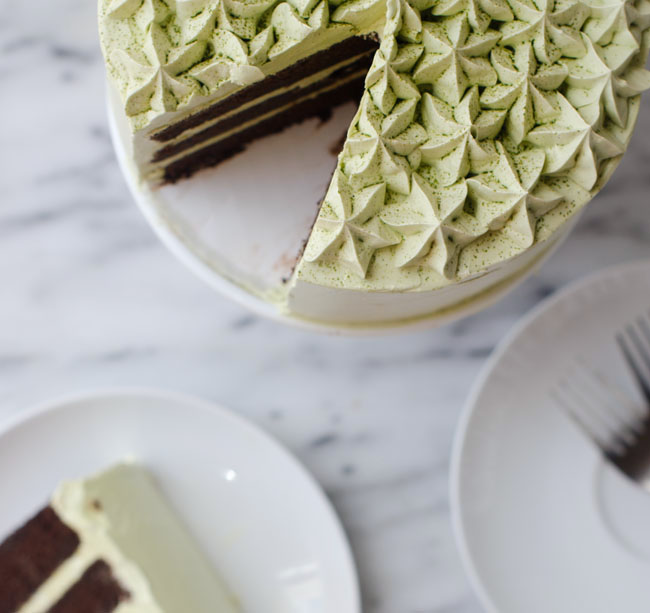
Now that we’ve gotten that out of the way, let’s move on to this cake. Sure, you can mix matcha powder and hot water and drink it and it’s great, but I’m pretty sure this stuff was meant to be used for frosting all along. Now that I’ve added matcha powder to swiss buttercream, I can’t imagine it any other way. The flavor is delicate yet earthy and goes so well with dark chocolate. I usually use this recipe for SMBC from Bravetart as my base recipe, but this time, I decided to play around with the ratios a bit. In terms of egg whites/butter/sugar, I usually do 1:1:3, especially if I’m adding something sweet to the frosting like chocolate or caramel sauce. I have also seen other bakers recommend a 1:2:3 ratio, but this time, I a tried 1:1.5:2 ratio. Less butter made the frosting less rich and let the delicate flavor of the green tea come through, and since the matcha isn’t sweet, I added a bit more sugar than I normally do.

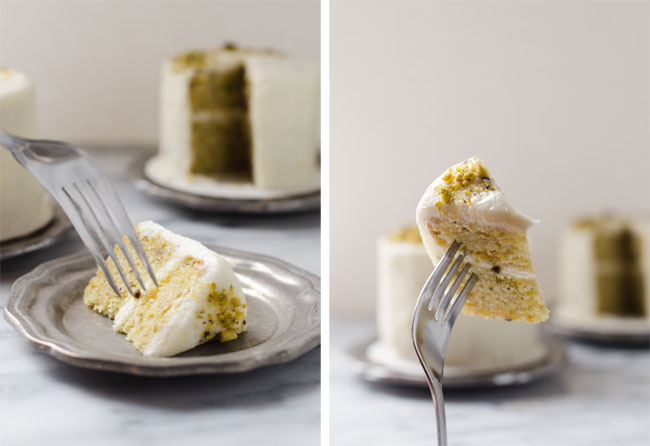
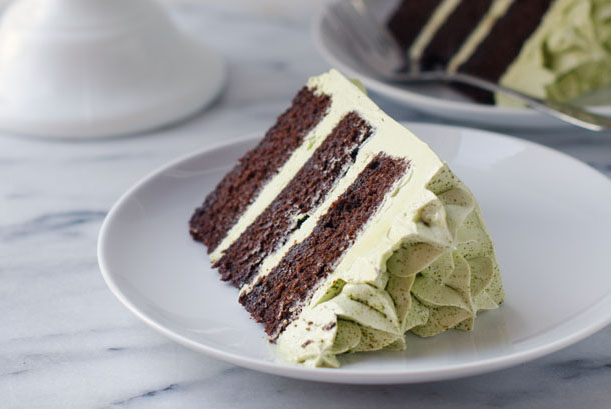
The chocolate cake is a hybrid of a few of my favorite cake recipes. I wanted it to be light and less fudgy than my go to chocolate cake, but not lacking in chocolate flavor. After some experimentation and a few fails (and maybe some tears) I decided to go with a butter based chocolate cake. I tend to prefer oil based chocolate cakes because they don’t dry out as fast, but I have a feeling that this cake won’t last long anyway, especially once you slather it in matcha frosting.

Dark Chocolate Matcha CakeDark Chocolate Matcha CakeDark Chocolate Matcha Cake

Print
Dark Chocolate Matcha Layer Cake

Yield: One 3 layer 6-inch cake

Ingredients

    For the Chocolate Cake:
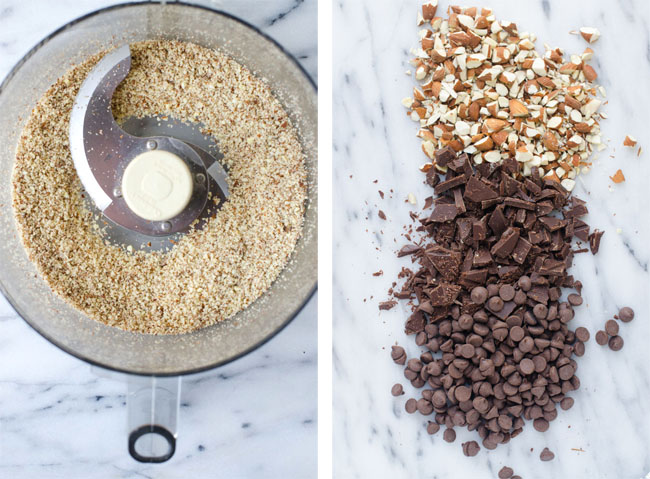
  • 2 ounces (60 grams) unsweetened chocolate, chopped
  • 3 tablespoons Dutch process cocoa powder
  • 2/3 cup (160 ml) boiling water
  • 1 cup (125 grams) all purpose flour
  • 1/2 teaspoon baking soda
  • 1/4 teaspoon salt
  • 11 tablespoons (155 grams) unsalted butter, softened but still cool
  • 1 cup (200 grams) granulated sugar
  • 2 large eggs, at room temperature
  • 1/2 cup (120 ml) buttermilk
  • 1 teaspoon pure vanilla extract
  • For the Matcha Frosting:
  • 6 large egg whites (or 170 grams liquid egg whites)
  • 1 1/4 cups (250 grams) granuated sugar
  • pinch of salt
  • 3 sticks (340 grams) unsalted butter, softened but still cool
  • 2 teaspoons pure vanilla extract
  • 1-2 tablespoons matcha powder plus additional for dusting

Instructions

    For the Chocolate Cake:
  1. Preheat the oven to 350 degrees fahrenheit.
  2. Grease and line 3 6-inch pans with parchment paper.
  3. In a bowl, combine the unsweetened chocolate, cocoa powder, and boiling water and whisk until smooth.
  4. In a separate bowl, whisk together the flour, baking soda, and salt.
  5. With an electric mixer (or the bowl of a stand mixer, beat together the butter and sugar on medium speed for 3 minutes, until light and fluffy.
  6. Scrape down the sides of the bowl and add the eggs one at a time, beating for about 30 seconds after each addition.
  7. Add the buttermilk and vanilla extract and beat to combine.
  8. With the mixer on low, add the 1/3 of the chocolate mixture followed by 1/2 the flour mixture, alternating between the 2 mixtures and starting and ending with the chocolate. Do not over mix.
  9. Divide the batter between the 3 pans and bake for 20-25 minutes or until a toothpick inserted into the center comes out clean.
  10. Cool on wire racks for about 15 minutes.
  11. Run a knife around the edge of the pans and turn the cakes out onto to wire racks to cool completely.
  12. For the Matcha Frosting:
  13. Combine the egg whites, sugar, and salt in a bowl (I used the bowl of my stand mixer).
  14. Place the bowl over a pan of simmering water. The bowl should not touch the water, nor should the water be at a rolling boil. It's the steam that's going to heat the egg whites, since you don't want scrambled eggs.
  15. Heat the egg white mixture until it reaches 160 degrees fahrenheit, whisking frequently so as not to get scrambled eggs.
  16. Remove the bowl from the heat, and whip the egg whites on medium high using the whisk attachment of your stand mixer.
  17. Whip the egg whites until they become fluffy and double in volume. The bowl should be cool to the touch (this will usually take several minutes).
  18. Turn the mixer down to medium low, and add the butter in one chunk at a time, until it has all been incorporated.
  19. If the mixture looks curdled at this point, this is normal. Just keep whipping for a few more minutes until it comes together. If the mixture looks soupy, you can add a few cubes of chilled butter, or stick the whole bowl in the refrigerator for about 15 minutes and then continue beating.
  20. Once the buttercream has become smooth, and the vanilla extract and beat until incorporated.
  21. Add one tablespoon of the matcha powder and beat to combine. Add additional matcha powder according to your taste.
  22. To Assemble the Cake:
  23. Place one layer of the cake on an 6-inch cake board.
  24. With an offset spatula, spread about 3/4 cup of the frosting on top of the first layer.
  25. Repeat this process with the second layer, spreading another 3/4 cup of the frosting on top.
  26. Place the 3rd layer of cake on top.
  27. Place the cake on a turntable, and apply a thin layer of the frosting on the sides and the top of the cake to lock in the crumbs.
  28. Let the frosting set up in the refrigerator for about 30 minutes.
  29. Apply the remainder of the frosting to the sides and top of the cake, using an offset spatula and a bench scraper to smooth out the sides.
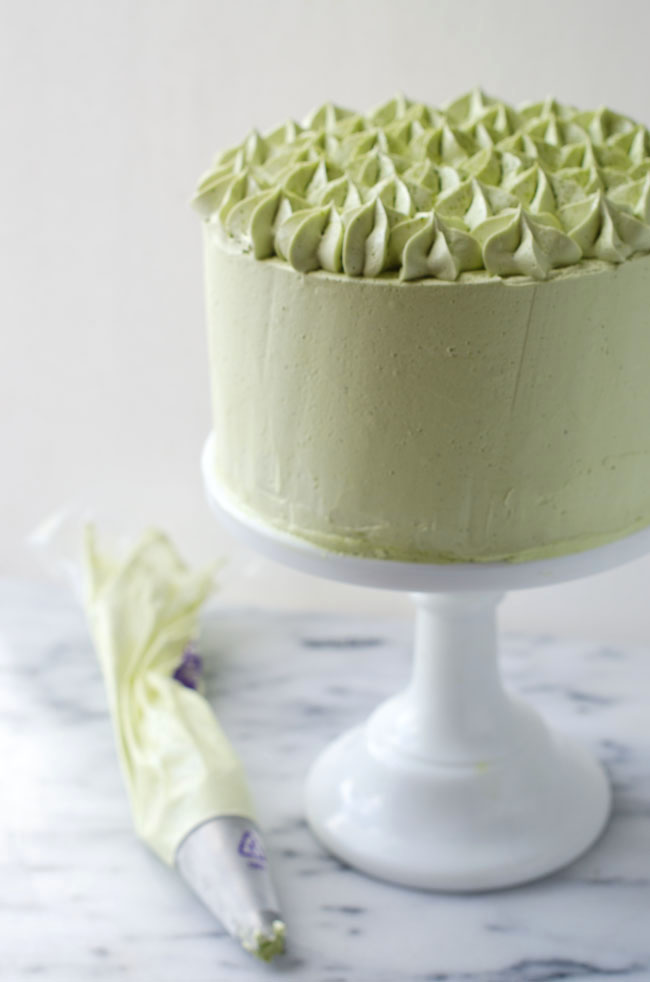
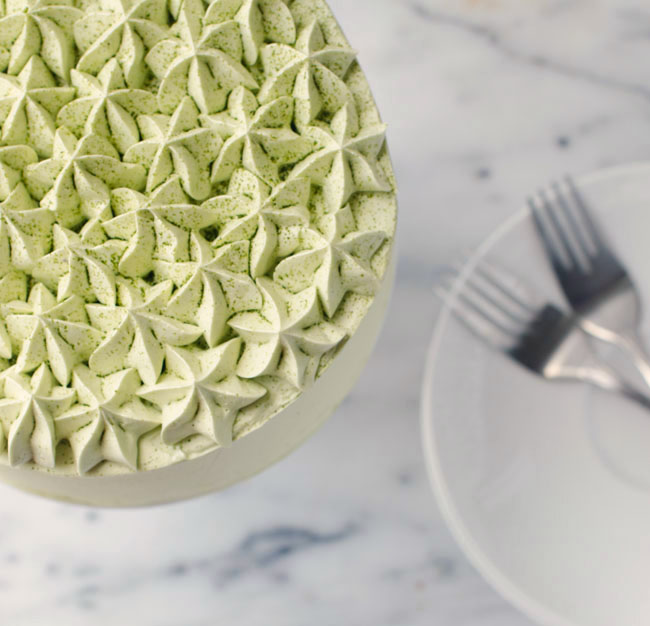
  30. Pipe the remainder of the frosting on top with an open star tip and dust with matcha powder.
  31. Serve at room temperature.
3.1
https://cakemerchant.com/2014/10/01/dark-chocolate-matcha-layer-cake/

41 Comments · Cake

Tea for Two: Pistachio Orange Mini Cakes with Grand Marnier Cream Cheese Frosting

09.21.14

Pistachio Orange Tea Cakes

It’s no secret that I love mini cakes, or all things miniature for that matter. If you don’t share in these sentiments, you may want to cover your eyes because it’s about to get obnoxiously mini up in here.

In college, my friends use to tease me about all of my mini kitchen things when they would come over. I would hear things like, “Why are your spoons so tiny?” or “When we go to Natasha’s house, we have to use miniature bowls.” In my head I’m thinking, duh, you have to use small spoons to eat out of small bowls, but I guess not everyone thinks like me.

Fast forward about 10 years or so to a few days after my wedding. I’m out shopping with my family who is visiting from India and we’re smack in the middle of tea time with no homemade chai in sight, so my aunt asks me to run into the coffee shop nearby and get her a cup of coffee. “I only want this much,” she says, showing me with her thumb and forefinger what would be a cup about this size. A few other family member chimed in saying they wanted the same. Perhaps they didn’t realize that they had traveled to supersized land, and the smallest cup at Starbucks was the size of their head. In the end, three people shared a tall latte still and couldn’t finish it. This leads me to believe that my affinity for miniatureness must be a cultural thing. Or a family thing. And now that I think about it, all of my small bowls and silverware were hand me downs from my mom anyway, so it must be my genes. See, I just can’t help but make mini cakes.

Pistachio Orange Tea CakesPistachio Orange Tea Cakes

These mini cakes go perfectly with a cup of afternoon tea. I’ve gotten out of the habit of observing tea time, but having my family visit recently made me want to start doing it again, even when it’s just me and Aaron in Dallas. I loved the fact that no matter what kind of chaos was going on during the hustle and bustle of the wedding, once a day, everything stopped for a little while so we could sit down and have tea. Mini cakes were not usually served (that would be my own personal touch), but since I’ve been missing my family a lot lately, I observed tea time with these mini cakes eaten off of mini plates with my mini cup of tea just for them. And also for my belly šŸ™‚

Like most of the mini cake recipes on this site, this makes a small batch of two cakes that were baked in tin cans. Tin cans make the best little cake pans (I used 15 oz. cans). Just make sure they are BPA free and that you clean them thoroughly before you use them. This version of mini cakes are made with ground pitachios in the batter. I had originally planned to make lemon pistachio cakes, but made a last minute change and added some orange zest instead (mostly because I was out of lemons). I ended up really liking the orange/pistachio combo, and also added a tablespoon of Grand Marnier to the frosting because I just so happened to have a mini bottle (I didn’t even plan it) on hand.

Just in case I haven’t convinced you that mini cakes are the best yet, here are a few more reasons:

1. They have a better frosting to cake ratio than cupcakes
2. No wastage (cake wastage is the worst)
3. You can have a whole cake to yourself. Seriously, when’s the last time you can say you ate a whole cake?
4. Less calories (than a large cake). Obviously this does not have less calories than kale.
5. You can pretend like you’re a giant and eat an entire slice in one bite.

Pistachio Orange Tea Cakes

I didn’t add a lot of sugar to the cream cheese frosting since I wanted the cake to be less sweet, but it did make the frosting a little runny. You can add more sugar if you like, or stick the frosting in the fridge for about 15 minutes like I did.

Print
Tea for Two: Pistachio Orange Mini Cakes with Grand Marnier Cream Cheese Frosting

Yield: 2 mini layer cakes

Ingredients

    For the Pistachio Orange Cakes:
  • 1/4 cup (40 grams) unsalted shelled pistachios (not dyed red)
  • 1/3 (42 grams) cup all-purpose flour
  • 3/4 teaspoon baking powder
  • 1/8 teaspoon salt
  • 3 tablespoons (42 grams) unsalted butter, at room temperature
  • 1/3 cup (67 grams) sugar
  • 1 large egg
  • 2 1/2 tablespoons whole milk
  • 1/4 teaspoon pure vanilla extract
  • 1 teaspoon finely grated orange zest
  • For the Grand Marnier Cream Cheese Frosting:
  • 3 ounces (85 grams) cream cheese, at room temperature
  • 5 tablespoons (70 grams) unsalted butter, at room temperature
  • 1 cup (115 grams) confectioner's sugar
  • 1/2 teaspoon pure vanilla extract
  • 1 tablespoon Grand Marnier
  • Finely chopped pistachios for topping

Instructions

    For the Pistachio Orange Cakes:
  1. Preheat the oven to 350 degrees fahrenheit.
  2. Grease and line 2 15 oz. tin cans with parchment paper (or use baking spray) and place the cans on a baking sheet.
  3. In a food processor, pulse the shelled pistachios until you reach a powdered consistency. Don't pulse for too long, or you will end up with paste.
  4. Add the flour, baking powder, and salt to the food processor and pulse for a few times to combine.
  5. With an electric mixer, beat the butter and sugar together on medium speed for about 3 minutes until light and creamy.
  6. Add the egg and beat to combine, scraping down the sides of the bowl when necessary.
  7. Add the milk, vanilla extract, and orange zest and beat to combine.
  8. Add the flour/pistachio mixture and stir or beat on low until just combined.
  9. Divide the batter between the 2 cans and place the entire baking sheet with the cans in the oven (this will make it easier to get in and out of the oven).
  10. Bake for 20-25 minutes (mine took right around 23) until a toothpick inserted into the center of the cakes comes out clean.
  11. Let the cakes cool on wire racks for about 15 minutes.
  12. Run a knife around the edge of the cakes and invert on to the wire racks to cool completely.
  13. For the Grand Marnier Cream Cheese Frosting:
  14. With an electric mixer, beat the cream cheese and butter on medium speed for 1-2 minutes until thoroughly combined.
  15. Add the confectioner's sugar and beat on low until just combined.
  16. Turn the mixer up to medium and beat for an additional 2-3 minutes.
  17. Add the vanilla extract and Grand Marnier and beat to combine.
  18. If the frosting is running, put it in the fridge for 10-15 minutes. If you like it sweeter, you can also add more powdered sugar to thicken it.
  19. To Assemble the Cake:
  20. Slice the layer cakes in half horizontally and place them on a 3 1/2 inch cake board (or directly on a plate if you don't have a small cake board).
  21. Spread a layer of frosting in between each layer.
  22. Place a dollop of frosting on the top of the cake, and spread evenly across the top of the cake. Work your way around the sides until the entire cake is covered with a thin layer of frosting. Let the crumb coat set in the fridge for about 30 minutes.
  23. Once the crumb coat has set, spread a thicker layer of frosting on the top and sides of the crumb coat to create a smooth finish.
  24. Sprinkle the tops of the cakes with chopped pistachios.
3.1
https://cakemerchant.com/2014/09/21/pistachio-orange-tea-cakes-grand-marnier-cream-cheese-frosting/

Cake recipe adapted from Epicurious

25 Comments · Cake

Dark Chocolate Almond Cookies

09.11.14

Dark chocolate almond cookies

I’ll admit that when I want a cookie, I don’t stray very often from the traditional chocolate chip variety. I have my go to recipe from Demolition Desserts that’s slightly crisp on the outside with perfectly chewy innards, and the only time I’ll mess with it when I’m feeling a little nutty in which case I’ll brown the butter. On occasion, I will try another recipe if it’s really intriguing, but the only time I’ll share it with you is if it’s exceptionally delicious. These cookies are exceptionally delicious.

These started out as Milk Chocolate Hazelnut Cookies from the Flour Bakery Cookbook, and after several transformations, became Dark Chocolate Almond Cookies. There’s almond meal in the batter, yo! Also, I couldn’t decide between chopped bittersweet chocolate that gets all melty and gooey in the cookies or chocolate chips that hold their shape, so I threw in a combination of both.

Dark chocolate almond cookiesDark chocolate Almond CookiesDark chocolate almond cookies

Some cookie dough needs minimal chill time in the fridge (or none at all) and some need a good overnight rest. I can tell you that these fall into the latter category. Since I’m somewhat impatient when it comes to desserts, I “tested” a few cookies early and the texture just wasn’t as good as those that got some shut eye. I would also recommend not making these cookies too large. I used a large cookie scoop for the first batch and ended up with burnt edges and an underdone center, so I ended up going with the small cookie scoop for the second batch and was pleased with the results.

Print
Dark Chocolate Almond Cookies

Yield: about 3 dozen cookies

Ingredients

  • 3/4 cup (1 1/2 sticks, 170 grams) unsalted butter, at room temperature
  • 2/3 cup (140 grams) granulated sugar
  • 2/3 cup (150 grams) dark brown sugar, packed
  • 1 teaspoon pure vanilla extract
  • 2 eggs, at room temperature
  • 1 1/4 cups (175 grams) toasted almonds
  • 1 1/2 (210 grams) cups unbleached all purpose flour
  • 1 teaspoon baking soda
  • 1 teaspoon kosher salt
  • 6 ounces chopped bittersweet chocolate
  • 6 ounces semisweet or bittersweet chocolate chips

Instructions

  1. Preheat the oven to 350 degrees fahrenheit and line 2 cookie sheets with parchment paper.
  2. With an electric mixer, beat the butter, granulated sugar, and brown sugar for 1-2 minutes until smooth.
  3. Add the vanilla and eggs and beat for an additional minute until combined.
  4. In a food processor, pulse 1/2 cup of the toasted almonds until you reach a fine powder (if you pulse it too long it will become oily).
  5. Coarsely chop the remaining 3/4 cup of almonds.
  6. Combine the ground almonds, chopped almonds, flour, baking soda, salt, chopped chocolate, and chocolate chips in a bowl.
  7. Stir the flour mixture into the butter mixture until just combined (do not over mix).
  8. Use a small cookie scoop to scoop the dough onto the cookie sheets about 1 1/2 inches apart.
  9. Bake for 9-10 minutes until the edges are golden brown.
  10. Cool completely on wire racks.
3.1
https://cakemerchant.com/2014/09/11/dark-chocolate-almond-cookies/

Recipe adapted The Flour Bakery Cookbook

12 Comments · Cookies

  • Newer Posts
  • 1
  • …
  • 18
  • 19
  • 20
  • 21
  • 22
  • …
  • 51
  • Older Posts

About Me

Welcome to the Cake Merchant! I’m Natasha, the cake maker behind this blog. Here, I share my favorite cakes, baking tips, dessert experiments, and the occasional picture of my dog... READ MORE

Keep In Touch

  • Email
  • Instagram
  • Pinterest
  • RSS

Subscribe

Small Batch Favorites

  • Vegan Blueberry Almond Crumb Muffins for Two
    Vegan Blueberry Almond Crumb Muffins for Two
  • Teeny Tiny Chocolate Cake for One
  • Double Chocolate Chip Skillet Cookie for Two
  • Mini One Bowl Yellow Cake with Malted Chocolate Frosting
  • Birthday Cakes in a Jar
  • Small Batch Chocolate Chip Cookies

© Copyright 2025. The Cake Merchant. All Rights Reserved. Design by Oh Wild.

Cleantalk Pixel