The Cake Merchant

  • Home
  • About
  • recipes
  • Contact

Chocolate Peanut Butter Sorbet

09.03.14

Chocolate Peanut Butter Sorbet

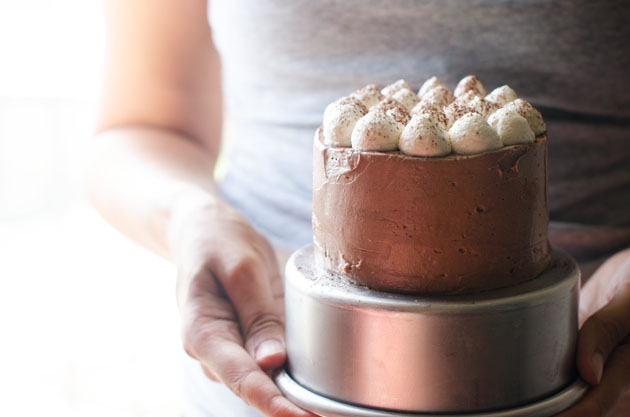
I keep seeing things all over the interwebs about the end of summer. Um…I’m not buying it. This happens to me pretty much every year. People are busting out the pumpkin and I’m still sweating it out here is Dallas. This year, we’ve really been sweating it out because our AC has been intermittent at best for the past week. In fact, I had a giant food fail last week while attempting to make scones in my non-airconditioned kitchen. The dough was literally melting as I rolled it out, so I figured ice cream was a better option, at least while it was 100 degrees in my house.

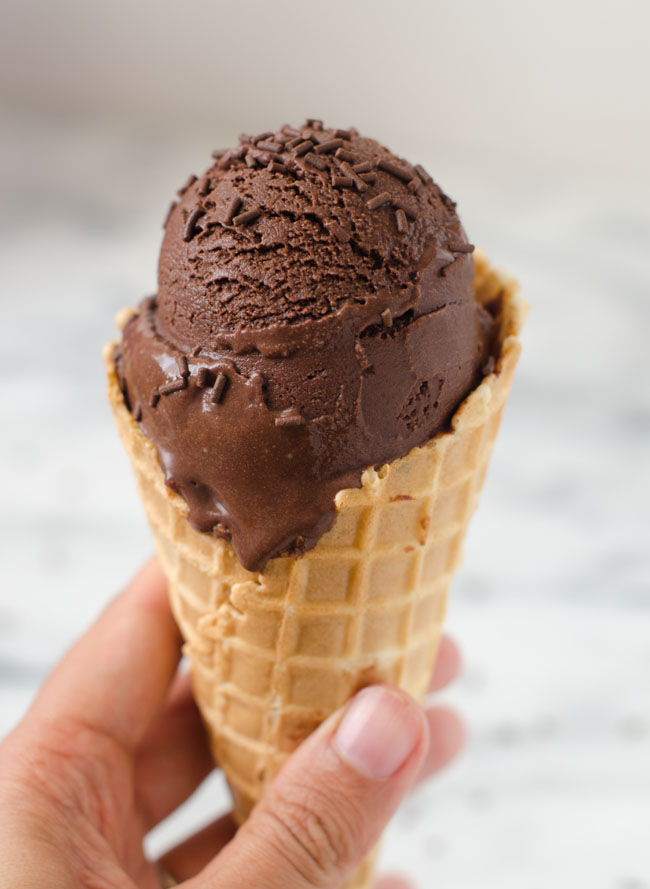
I’ve been experimenting with non-dairy chocolate ice creams all summer long, but none have been good enough to share. The coconut milk versions had strong coconut overtones, and while I’m a fan of coconut, I wanted it to taste like chocolate. Other non-dairy milks gave the ice cream a weird icy texture, so you can imagine my surprise when I came across a decadent looking chocolate sorbet.

Chocolate Peanut Butter SorbetChocolate Peanut Butter SorbetChocolate Peanut Butter Sorbet

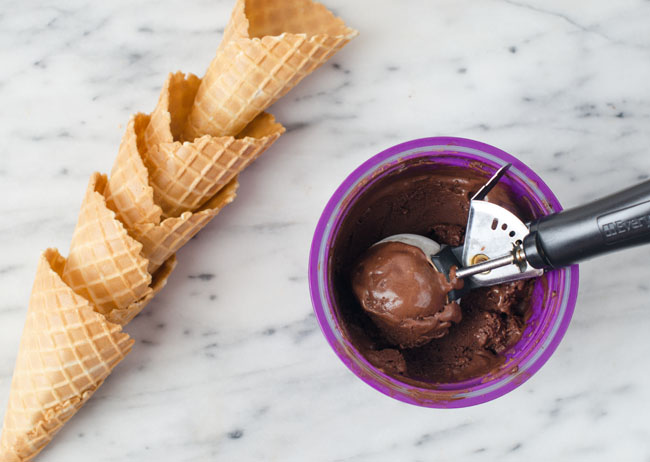
I’m always skeptical of water based “ice cream,” but this stuff was so good, I made it twice in one week. It was so creamy, my friends didm;t believe it was sorbet. The first time, I made David Lebovitz’s original recipe. The second time, I replaced some of the chocolate with creamy peanut butter and liked it even better. The peanut butter version is what I’m sharing with you today, but if you’re not a fan, you can replace the peanut butter with an extra ounce of chocolate.

Print
Chocolate Peanut Butter Sorbet

Yield: 1 1/2 pints

Ingredients

  • 1 1/2 cups water, divided
  • 2/3 cup granulated sugar
  • 1/2 cup (75 g) unsweetened Dutch-process cocoa powder (I used Valrhona)
  • Pinch of salt (if your peanut butter is unsalted)
  • 3 ounces bittersweet or semisweet chocolate, finely chopped
  • 2 tablespoons creamy peanut butter
  • 1/2 teaspoon vanilla extract

Instructions

  1. In a large saucepan, whisk together the 1 cup of water, sugar, cocoa powder, and salt over medium heat until the mixture begins to boil.
  2. Continue to let the mixture boil for about 45 seconds, whisking constantly.
  3. Remove the saucepan from the heat and mix in the chocolate and stir until it has melted.
  4. Whisk in the peanut butter until smooth.
  5. Add the vanilla and the remaining 1/2 cup of water and mix until smooth.
  6. Transfer the mixture into a blender and blend for about 15 seconds.
  7. Pour the mixture into a heat proof bowl and let it chill thoroughly in the fridge for at least 4 hours.
  8. Freeze the mixture in your ice cream maker according to the unit's instructions.
  9. Transfer the ice cream into a container and let harden in the freezer for at least one hour before serving.
  10. If the ice cream is too hard to scoop, let it thaw for 5-10 minutes before serving.
3.1
https://cakemerchant.com/2014/09/03/chocolate-peanut-butter-sorbet/

Recipe adapted from The Perfect Scoop

22 Comments · Ice Cream

Mini Mocha Layer Cake

08.21.14

Mini Mocha Cake

One of the best things about my wedding was seeing family members that I hadn’t seen in years. My family is spread out all over the world, and they came from California, Canada, Australia, and India among other places. My grandmother’s 89th birthday just so happened to be two days after my wedding, and with so many family members still around, I had the perfect reason to bake a great big chocolate cake. I didn’t get a chance to take a picture of it since it was gobbled up so quickly, but the cake I am sharing with you today is a miniature version of what I made for my family.

My grandmother doesn’t eat eggs, even in cake. This used to be quite an ordeal for me when I tried to bake her birthday cakes growing up. The lack of eggs along with the fact that her tiny little oven only has 2 settings (off and incinerate) made for some interesting cake like concoctions. Having a good eggless recipe comes in handy not only when baking for my grandmother, but also when trying to pair a recipe down for a mini cake. Have you ever tried to use 1/3 of an egg? It’s kind of a pain. Recipes are so much easier to make tiny when there is no egg involved.

Mini Mocha CakeMini Mocha Cake

For my first recipe after a long hiatus, I just couldn’t resist doing a mini layer cake. They are just too cute, and the perfect size for two (or one if you’re really hungry). I used a 4-inch cake pan and then sliced the cake into three layers, because I wanted more room for frosting. You can also slice it into two, or just leave it as one layer if you like. I also added a shot of espresso to the frosting to give it a mocha flavor, but you can easily leave it out and add an extra tablespoon of cocoa powder for a rich chocolate frosting.

Mini Mocha Cake

Print
Mini Mocha Layer Cake

Yield: One 3 layer 4-inch cake

Ingredients

    For the Cake:
  • 1/3 cup (80 ml) milk (non-dairy milk is fine)
  • 1/4 teaspoon white or cider vinegar
  • 1/4 cup (50 grams) granulated sugar
  • 2 tablespoons vegetable oil
  • 1/2 teaspoon vanilla extract
  • 1/3 cup all purpose flour
  • 2 tablespoons cocoa powder
  • 1/4 teaspoon baking soda
  • 1/8 teaspoon baking powder
  • 1/4 teaspoon salt
  • For the frosting:
  • 1/2 cup (110 grams) unsalted butter, at room temperature
  • 1 cup (115 grams) confectioner's sugar
  • 1 tablespoon cocoa powder
  • 1/2 teaspoon vanilla extract
  • 1 ounce (30 ml) espresso, cooled to room temperature
  • pinch of salt
  • For the Whipped Cream:
  • 1/4 cup (60 ml) heavy cream, chilled
  • 1 teaspoon granulated sugar
  • 1/2 teaspoon vanilla extract
  • cocoa powder for dusting (optional)

Instructions

  1. For the Cake:
  2. Preheat the oven to 350 degrees fahrenheit.
  3. Grease and line a 4-inch cake pan with parchment paper.
  4. In a medium bowl, whisk together the milk and vinegar and set aside for a few minutes to curdle.
  5. Add the sugar, vegetable oil, and vanilla extract and whisk together until the mixture becomes foamy.
  6. Add the flour, cocoa powder, baking soda, baking powder, and salt.
  7. Whisk together until combined.
  8. Pour the batter into the prepared cake pan and bake for 20-23 minutes, until a toothpick inserted into the center comes out clean.
  9. Cool for about 10 minutes on a wire rack, and then turn the cake out onto the wire rack and cool completely.
  10. For the frosting:
  11. With an electric mixer, beat the butter, sugar, and cocoa powder together on low until just combined.
  12. Turn the mixer up to medium and continue beating for 2-3 minutes.
  13. Add the vanilla extract, espresso, and salt and beat to combine.
  14. For the whipped cream:
  15. With an electric mixer or the whisk attachment on your stand mixer, beat the cream until stiff peaks are about to form.
  16. Add the sugar and vanilla extract and beat until stiff peaks have formed.
  17. Keep refrigerated until ready to use.
  18. To Assemble the Cake:
  19. Slice the cake into 3 even layers.
  20. Place the bottom layer of the cake on a cake board or plate and spread about 2 tablespoons of frosting on top.
  21. Do the same with the second layer.
  22. Place the last layer on top and apply a thin coat of frosting around the top and the sides of the cake to crumb coat it.
  23. Put the cake in the fridge and let the frosting set for 30 minutes.
  24. Once the crumb coat has set, spread a thicker layer of frosting on the top and sides of the crumb coat to create a smooth finish.
  25. Place the whipped cream in a piping bag fitted with a round tip and pipe the whipped cream on top of the cake.
  26. Dust with cocoa powder.
3.1
https://cakemerchant.com/2014/08/21/mini-mocha-layer-cake/

Notes:

The frosting makes enough for a 3 layer cake with a crumb coat and a little left over. If you don’t plan to divide your cake into layers or crumb coat, you can cut the frosting recipe in half.

You can make this recipe vegan by using non-dairy milk in the cake, replacing the butter in the frosting with margarine and/or shortening, and omitting the whipped cream.

Cake recipe adapted from Vegan Cupcakes Take Over the World

39 Comments · Cake

We Got Married!

08.13.14

Hello, my cake loving friends! It’s been a looong time since I’ve posted on here. This is probably the longest I’ve ever been away from my blog, but I promise I’ve had good reason. I got married last month, and Aaron and I got back last week from our honeymoon in Turks and Caicos. Let’s just say that it has been a challenge getting back to real life. I still wake up in the morning wondering why there is no view of the beach outside my window and why nobody is handing me a rum punch as I laze by the pool. It was a relaxing vacation, but I’m finally ready to get back to baking!

I don’t share too much personal stuff on this blog, but I wanted share a few unofficial photos to tide you over until the next recipe. Most of these were taken by friends and family (professional photos to come). Keep in mind, my family is Indian, so we had quite a colorful wedding. Aaron and his family were good sports about the whole thing, and in case you are wondering, he is riding a horse in the 2nd picture!

photo 3-4Wedding2WeddingWedding3

Turks and Caicos was the perfect destination for both of our vacation styles. Aaron is a lot more adventurous than I am. He loves camping, hiking, and all things outdoorsy. He’s also a SCUBA instructor in his free time. I’m more of what Aaron describes as an “Eating ice cream on the beach while reading and petting a puppy” kind of girl. While we did get to do all of these things (including pet puppies), we also got to do some diving, which is something I never would have done on my own. I’ve only dived in Texas lakes before, so the blue water was a new experience for me. In honor of shark week, I’ve included a link to my very first shark spotting! See you soon with a new recipe.

11 Comments · Uncategorized

  • Newer Posts
  • 1
  • …
  • 19
  • 20
  • 21
  • 22
  • 23
  • …
  • 51
  • Older Posts

About Me

Welcome to the Cake Merchant! I’m Natasha, the cake maker behind this blog. Here, I share my favorite cakes, baking tips, dessert experiments, and the occasional picture of my dog... READ MORE

Keep In Touch

  • Email
  • Instagram
  • Pinterest
  • RSS

Subscribe

Small Batch Favorites

  • Vegan Blueberry Almond Crumb Muffins for Two
    Vegan Blueberry Almond Crumb Muffins for Two
  • Teeny Tiny Chocolate Cake for One
  • Double Chocolate Chip Skillet Cookie for Two
  • Mini One Bowl Yellow Cake with Malted Chocolate Frosting
  • Birthday Cakes in a Jar
  • Small Batch Chocolate Chip Cookies

© Copyright 2025. The Cake Merchant. All Rights Reserved. Design by Oh Wild.

Cleantalk Pixel