The Cake Merchant

  • Home
  • About
  • recipes
  • Contact

Four Ways to Frost a Cupcake with a Wilton 1M Tip

03.28.17

Wilton 1M tutorial

Hey, guess what? I have a video for you today! I’ve had several requests from readers over the years to do a frosting tutorial, so I’m really happy to be bringing you this post along with a video. It has been a goal of mine to add more how-to videos (you can see my first one here), and I decided to start what I hope will be a series of tutorials with my favorite and most used frosting tip, the Wilton 1M.

Wilton 1M tutorial

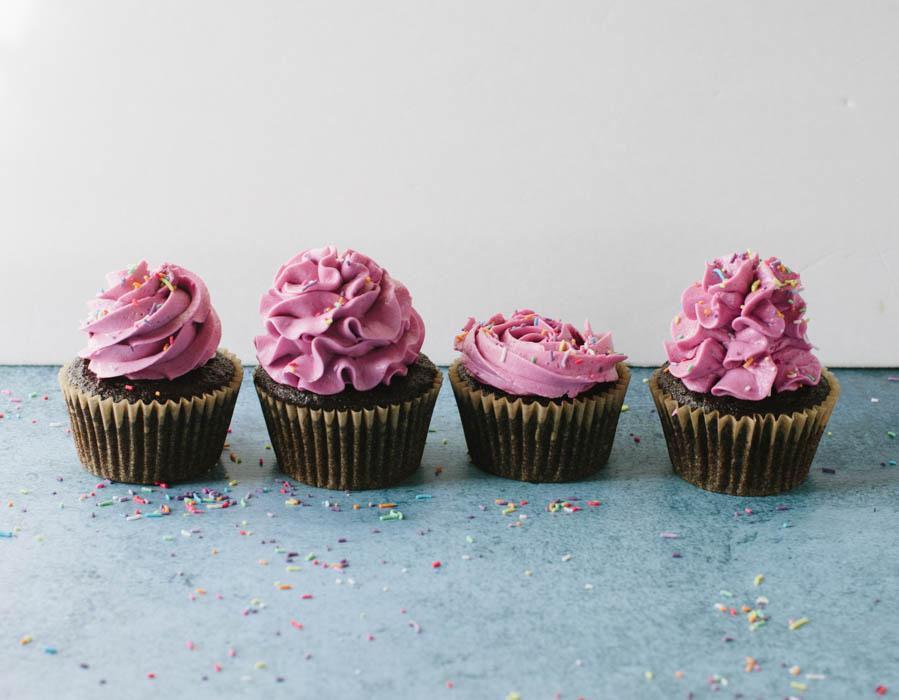
Here are the descriptions in order from left to right.

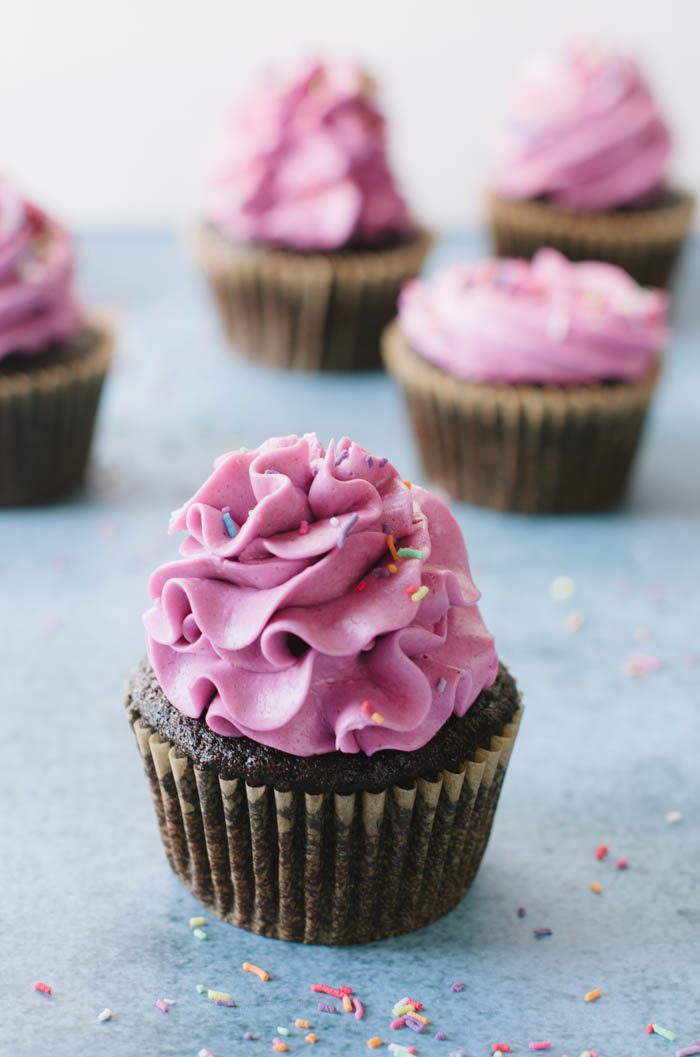
1. The Classic Swirl– This is what you see in most cupcake shops, and it’s super easy to do. Start by holding your piping bag 90 degrees over the center of the cupcake and pipe a dollop in the middle. Without releasing pressure, move your piping bag to the outside edge of the cupcake and in a steady motion, piping overlapping circles. Each one should be a little bit smaller until you reach the top of the cupcake.

2. The Ruffle– This is what I use most often when I decorate cupcakes because I love the frilly look that it gives. Beware though, it uses a lot of frosting. This works particularly well when you are using a less sweet frosting like Swiss buttercream, so the sugariness is not as overwhelming. It’s the same basic concept as the classic swirl, but you are going to apply more pressure and move slowly as you pipe.

3. The Rosette– The easiest rose ever. Start like you would with a classic swirl, but after you pipe a dollop in the center, move in concentric circles from the inside out.

4. The Beehive– I had a hard time coming up with a name for this one. Aaron thought it looked like an updo, so alas, the beehive. Hold your piping bag at 90 degrees over the center of the cupcake and squeeze. Lift slightly and squeeze again, but a use slightly less pressure so the frosting gets smaller as it goes up. I did this 4 times.

Wilton 1M tutorial

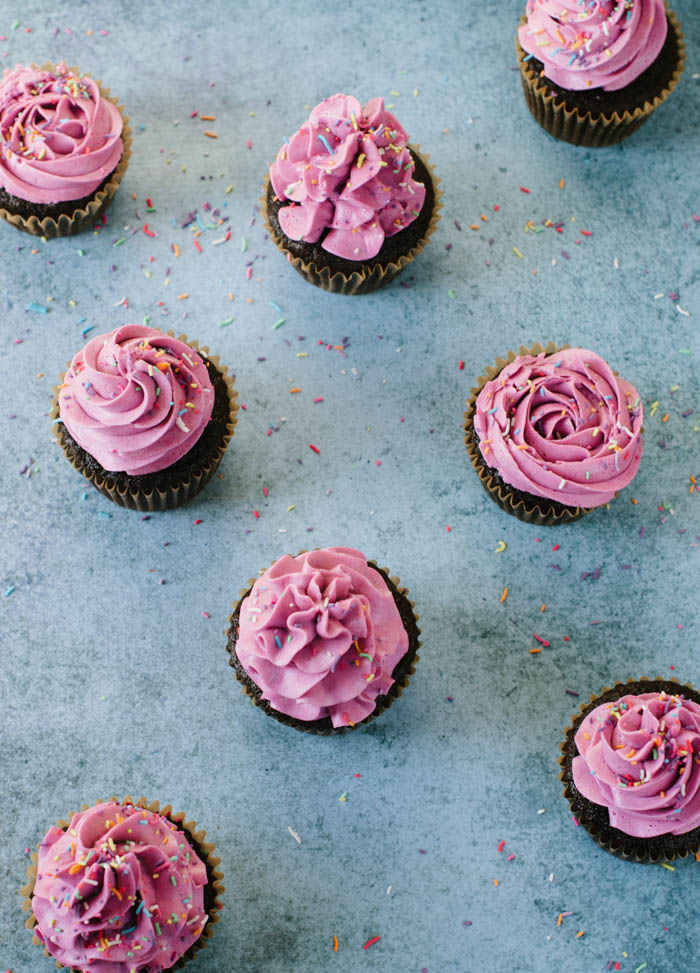
And there you have it. Four easy ways to decorate your cupcakes. If you haven’t done a lot of piping before, you can practice on parchment paper first. Then just scoop into a container and put it back in the bad when you are ready to frost your cupcakes. If you practice a lot, your frosting might get melty (unless your frosting is shortening based) so stick it in the fridge for a bit before piping again.

Wilton 1M tutorial

18 Comments · Cupcakes, Tutorials

Bar Snack Cake

03.13.17

Bar Snack Cake

I can’t believe that after 5 years of blogging, I’ve never made a chocolate stout cake! This one has been brewing (see what I did there) in my head for a while, and I wasn’t going to let another St. Patty’s Day go by without posting one. It ultimately morphed into this manly creation that I call the Bar Snack Cake. It’s paired with a peanut butter pretzel frosting, and ganache is made with beer rather than cream.

Bar Snack Cake

Over the last few years, I’ve developed a taste for stout beer. I’m not really a fan of Guinness, but I do like a good chocolate or coffee stout. Originally, I thought the beer flavor would be subtle and just add some depth of flavor, but you can really taste it in both the cake and the ganache, so use a beer that you like the taste of. I used a coffee stout and thought it paired well with the chocolate.

Bar Snack Cake

The cake can be made a few days in advance, but I’d recommend frosting it the day that it is baked to keep the pretzels from getting soggy. If you don’t mind a little extra work, you can swap out the crushed pretzels for malted pretzel crumbs from this Momofuku inspired recipe I posted a couple of years ago.

Bar Snack Cake

A couple of weeks ago, I took a poll on Facebook and Instagram, and asked my readers to choose between 3 recipes that they wanted to see on the blog. I results were split pretty evenly 3 ways, so this post is the first of the three. Stay tuned for the next post- a frosting tutorial!

Read The Post

8 Comments · Cake, Holiday

In the Oven: February Edition

02.28.17

His and Hers Mini Layer Cakes

Welcome back to a new edition of In the Oven! With Valentine’s Day and my birthday being this month, there was no shortage of baked goods that came out of my kitchen. The picture you see above is of the his and hers mini cakes that I made for Valentine’s Day. The cakes are a version of these Chocolate Covered Strawberry Mini Cakes I made a few years ago, which have become a yearly tradition for us.
His- chocolate cake with mocha frosting and mini chocolate chips
Hers- chocolate cake with peanut butter filling, malted vanilla frosting, chocolate ganache and a chocolate malt ball.
Mine was a take on chocolate covered peanut butter malt balls that I recently discovered in the bulk section at Whole Foods.

Read The Post

7 Comments · In the Oven

  • Newer Posts
  • 1
  • 2
  • 3
  • 4
  • 5
  • 6
  • …
  • 51
  • Older Posts

About Me

Welcome to the Cake Merchant! I’m Natasha, the cake maker behind this blog. Here, I share my favorite cakes, baking tips, dessert experiments, and the occasional picture of my dog... READ MORE

Keep In Touch

  • Email
  • Instagram
  • Pinterest
  • RSS

Subscribe

Small Batch Favorites

  • Vegan Blueberry Almond Crumb Muffins for Two
    Vegan Blueberry Almond Crumb Muffins for Two
  • Teeny Tiny Chocolate Cake for One
  • Double Chocolate Chip Skillet Cookie for Two
  • Mini One Bowl Yellow Cake with Malted Chocolate Frosting
  • Birthday Cakes in a Jar
  • Small Batch Chocolate Chip Cookies

© Copyright 2025. The Cake Merchant. All Rights Reserved. Design by Oh Wild.

Cleantalk Pixel